
Atlas includes some standard smart query definitions that simplify pulling data such as LYBUNT and SYBUNT donors. If a standard definition does not exist for your needs, you can create a new definition based on an ad-hoc query. General instructions for creating a new user-defined Smart Query definition are here. This article is intended to help create a Smart Query specifically for use in a Global Change that requires an Address, Email Address, or Phone Selection.
This is a two step process: (1) create the user-defined Smart Query definition, and (2) create a Selection based on that definition.
First, create the user-defined Smart Query definition.
You may have noticed this Create smart query option when building an ad-hoc query. Do not use this option when creating a Smart Query for this purpose. Instead, start at Administration > Application > Shell Design, and go to the User-defined Smart Queries. Click on Add.
For Source View, select Constituents.
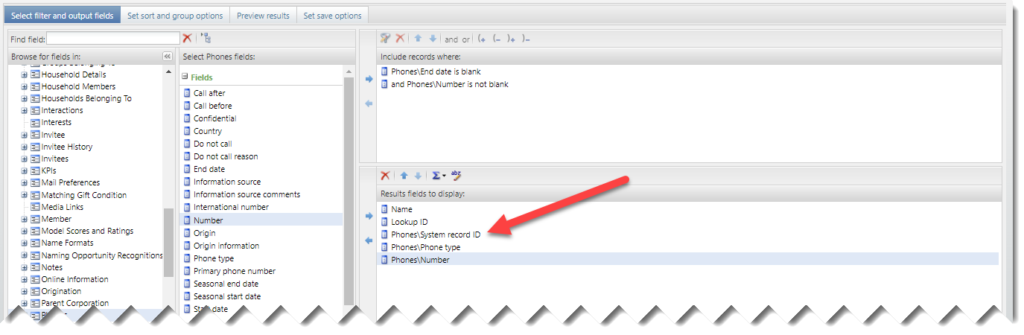
In Result fields to display (not Include records where),
- include the System record ID for the record type you’re selecting; in this example, we’re building a selection of Phone records, so the result set includes Phones\System record ID.
- include any fields you would like to filter on.
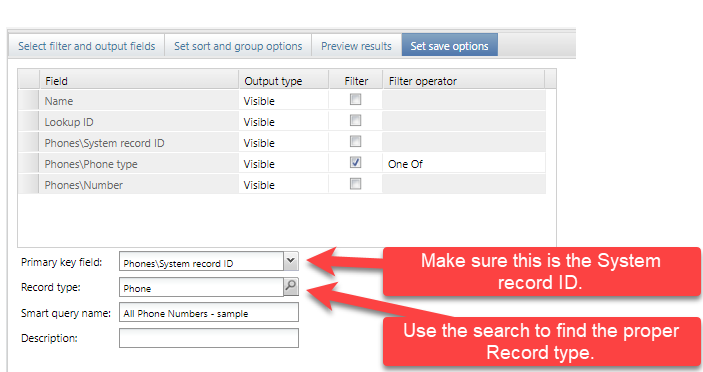
Next, click on the Set save options tab.
- Define filters: click on the Filter checkbox, and then choose a Filter operator (e.g. Equal To, Not Equal To, One Of). At least one filter is required, but they are optional when you actually create the Selection.
- Set the Primary key field to the System record ID. (The Primary key field drop down list is comprised of the Output fields selected above.)
- Set the Record type to the record type to select; use the search to find the exact type. This one seems obvious, but there are dozens of different record types, so use the Record type search to make sure you get it right.
- Enter a Name and save it.
Second, create a Selection using this Smart Query definition.
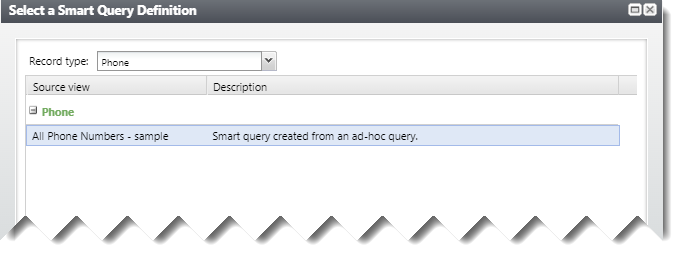
Go to Analysis > Information library, and click on Add a smart query.
For Record type, you should now be able to filter for the Record type of the Smart Query created above and select your new Smart query.
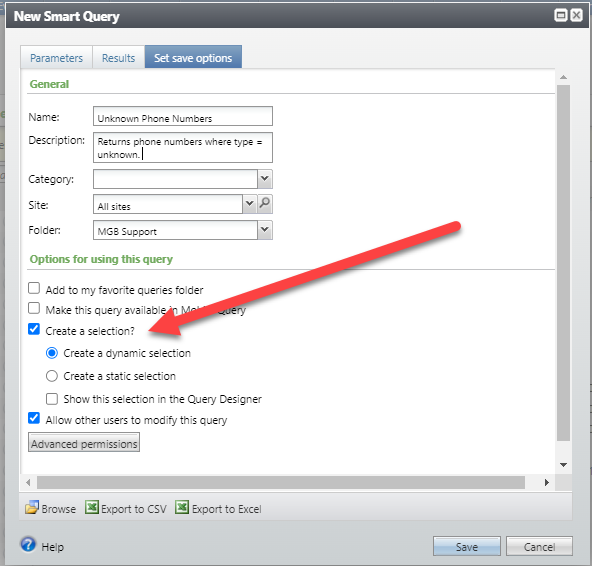
To create the new Smart Query definition:
- Fill out the Parameters tab. It’s optional, but be sure you don’t create a Selection that returns (for example) every phone number in the database.
- Fill out the Set save options tab. Be sure to check Create a selection?
- Save and close it.
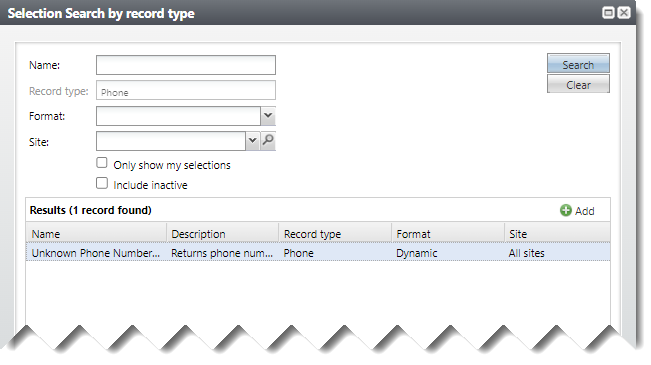
Now, when you create an instance of the Manage Phone Types Global Change and search for a Phone selection, this one should be available in the Selection Search window.
Good to know!
- As noted above, there are dozens of record types; if the Selection search window doesn’t return what you want, you probably picked the wrong record type when creating your user-defined smart query. For instance, to select Emails, you need Email Address, not Email.

How Do I?
- Permission a user-defined smart query? You may find that not all users can access your user-defined smart query when creating a new definition. See the Security Administration article.